
If you’re new to lab management, your first instinct might be to buy all the equipment you think you need, jot down a purchase list, and call it a day. But when you start running experiments, taking on client projects, or preparing for audits, you’ll quickly run into gaps: When was this analytical balance last calibrated? Does that chromatography system have an active software license? Why are two units giving wildly different results for the same sample? And why did you spend thousands on a piece of equipment that’s been sitting unused for 6 months, taking up valuable bench space?
Most of these problems can be solved with a well-built test equipment list. This isn’t just a static inventory of instruments – it’s the central index for your entire lab equipment management workflow, covering everything from initial selection and procurement to daily use, calibration, maintenance, and compliance audits. Below, we’ll break down how to build and use this list effectively, plus share fully customizable templates for asset registers, calibration schedules, maintenance logs, and more – all adaptable for new labs, third-party testing providers, R&D QC teams, and accredited certification facilities.
4 Preparations Before Building Your List
Don’t jump straight to listing equipment. Complete these four prep steps first to avoid building a list that looks good on paper but doesn’t work for your actual needs.
1. Define Your Test Requirements
The goal of buying equipment is to get tools that fit your work and work well – not to buy the most expensive, highest-spec units on the market. Start by mapping your most commonly used test methods to determine required range, resolution, accuracy class, detection limit, repeatability, and sample throughput.
Avoid defaulting to oversized specs “just to be safe.” A larger range can actually reduce accuracy for small samples. Instead, balance your needs against measurement uncertainty, sample matrix, method limits, and risk level. For example, if you mostly test 100g routine samples, a 200g, 0.1mg readability analytical balance is more than sufficient – there’s no need to spend 3x more for a 2kg range unit.
2. Map Compliance Requirements
Different test projects and clients may have different equipment requirements. Sort these by priority to avoid missing critical rules:
- International/national test method standards and industry regulations
- Explicit client requirements
- Lab accreditation and certification rules
Pay special attention to whether standards specify equipment type, performance metrics, calibration/verification requirements, method validation, or intermediate check protocols.
Note: Requirements like UL, CE, or FDA approval are usually product market access, industry regulatory, or client-specific rules – they are not the same as lab accreditation requirements, and should be tracked separately.
3. Verify Facility and Safety Conditions
Before buying any equipment, confirm your lab can actually house and operate it safely:
- Facility conditions: Check available floor/bench space, weight load capacity, vibration isolation needs, temperature/humidity control, cleanliness levels, and functional zoning. For example, a heavy, high-precision ICP-MS cannot sit on a regular lab bench – it requires a dedicated vibration-isolated table.
- Utility and safety support: Confirm access to required water, power, and gas supplies, plus fume extraction, waste disposal (liquid and gas), explosion protection, biosafety, and radiation safety infrastructure. For example, muffle furnaces need dedicated ventilation space, while biosafety cabinets require exhaust/recirculation setups aligned with risk assessments and manufacturer specifications.
4. Calculate Total Cost of Ownership (TCO)
Many buyers only look at upfront purchase price and assume the cheapest option is the best deal. But ongoing costs can easily exceed the initial price tag. For example, an HPLC system might cost $25,000 upfront, but annual consumables, calibration, maintenance, and software licenses can add $5,000–$10,000 per year – doubling the total cost over 5–6 years.
Always calculate full lifecycle costs: purchase price, installation fees, calibration/verification costs, maintenance, consumables, software licenses, training, downtime losses, and depreciation.
Adjust your procurement strategy based on usage: buy core, high-frequency equipment outright; purchase auxiliary equipment as needed; for low-use, high-cost gear (like high-end mass spectrometers or EMC test systems), prioritize outsourcing, rental, or shared facility access – it’s almost always cheaper than buying.
Test Equipment Categories
We’ve organized equipment by general use and industry specialization, so you can quickly find what applies to your lab.
General Lab Essentials
These are the foundational tools used in nearly every lab. Start your list with this category.
Sample Preparation
Sample prep is the first step for most tests, and these tools see heavy use. Be sure to track these key details for each: range, resolution, accuracy class, calibration status, intended use, and environmental requirements.
Common equipment: Analytical balances, micropipettes, centrifuges, drying ovens, ultrasonic cleaners, water purification systems, magnetic stirrers, vortex mixers, muffle furnaces, homogenizers.
Metrology and General Measurement
These basic measurement tools are found in almost every lab, and most require regular calibration: Calipers, micrometers, height gauges, thermohygrometers, pressure gauges, flow meters, digital multimeters, power supplies.
Environmental and Safety Monitoring
These tools directly impact test environment stability and personnel safety – don’t leave them off your list: Temperature/humidity data loggers, differential pressure gauges, gas leak detectors, fume hoods, biosafety cabinets, eyewash stations, emergency showers, personal protective equipment (PPE), high-pressure gas cylinder restraints and alarm systems.
Pro tip: Fume hood performance can be tested per ASHRAE 110 standards. There is no universal required face velocity – set it based on your lab’s risk level, applicable regulations, and manufacturer specifications.
QC and Data Management
Quality control supplies and management tools are also part of your equipment list: Certified reference materials (CRMs), standard solutions, QC samples, Excel asset logs, laboratory information management systems (LIMS), calibration reminder tools, equipment QR code/barcode labels. Adding a QR code to each device lets staff pull up manuals, calibration certificates, and SOPs instantly – far faster than digging through physical files.
Specialized Test Equipment
Different lab fields use different dedicated tools. We’ve split these into entry-level and advanced tiers to match labs of all sizes.
Chemical & Physical Analysis
- Entry-level: UV-Vis spectrophotometers, gas chromatographs (GC), high-performance liquid chromatographs (HPLC), pH meters, conductivity meters, potentiometric titrators, refractometers, polarimeters, density meters, viscometers
- Advanced: Atomic absorption spectrometers (AAS), inductively coupled plasma optical emission spectrometers (ICP-OES), inductively coupled plasma mass spectrometers (ICP-MS), ion chromatographs (IC), Fourier-transform infrared spectrometers (FTIR), X-ray fluorescence spectrometers (XRF), GC-MS, LC-MS/MS, dissolution testers
Materials Testing
- Entry-level: Universal testing machines (UTMs), hardness testers, salt spray chambers, temperature/humidity test chambers, optical microscopes, thickness gauges
- Advanced: Impact testers, fatigue testers, friction and wear testers, differential scanning calorimeters (DSC), thermogravimetric analyzers (TGA), scanning electron microscopes (SEM), X-ray diffractometers (XRD), UV aging chambers, thermal shock chambers, coordinate measuring machines (CMMs)
Biomedical & Life Sciences
- Entry-level: PCR thermocyclers, gel documentation systems, CO₂ incubators, inverted microscopes, autoclaves, biosafety cabinets, colony counters, microplate readers, incubator shakers
- Advanced: Quantitative PCR (qPCR), flow cytometers, chemiluminescence immunoassay analyzers, cell counters, clean benches, microbial identification systems
Electrical & Electronics
- Entry-level: Oscilloscopes, insulation resistance testers, hipot testers, ground resistance testers, leakage current testers, vibration test tables, IP rating test equipment, electronic loads
- Advanced: Spectrum analyzers, signal generators, power analyzers, LCR meters, surge/ESD/EFT test gear. Note: If you use EMC test systems infrequently, outsourcing is almost always more cost-effective than buying.
Environmental Monitoring
- Entry-level: Turbidimeters, free chlorine analyzers, COD analyzers, dust samplers, PM2.5 monitors, portable gas detectors, soil nutrient quick testers
- Advanced: Ammonia nitrogen/total phosphorus analyzers, soil heavy metal testing equipment, integrated air samplers, total organic carbon (TOC) analyzers
Optical & Color Measurement
These tools are common in labs that test appearance and optical performance: Gloss meters, colorimeters, light meters, haze meters, light transmittance meters, spectrophotometers, luminance meters.
Industry-Specific Quick-Start Lists
If you work in a specific industry, use these curated setups to skip sorting through individual categories:
- Food & beverage: GC/HPLC, GC-MS/LC-MS/MS, AAS/ICP-MS, microbial culture and identification equipment, biosafety cabinets, autoclaves, microplate readers
- Medical devices: Biosafety cabinets, autoclaves, universal testing machines, temperature/humidity chambers, EMC equipment, cleanliness/particle counting equipment, EO residual analysis tools
- Electronics & electrical appliances: Oscilloscopes, safety testers, EMC test systems, temperature/humidity chambers, vibration tables, power analyzers
- Automotive components: Universal testing machines, salt spray chambers, thermal shock chambers, CMMs, hardness testers, aging test chambers
- Textiles & apparel: Color fastness testers, tensile testers, formaldehyde detectors, pH meters, abrasion/pilling testers
- Building materials: Compression testers, weathering chambers, flammability testers, hardness testers, thermal conductivity testers
- Packaging & transportation: Drop testers, vibration tables, compression stack testers, temperature/humidity chambers, configured per ISTA and similar standards
Equipment Selection, Procurement, and Acceptance
Once you have a draft list of needed equipment, follow these guidelines to choose, buy, and validate tools without costly mistakes. Lab equipment isn’t a daily purchase – a bad choice wastes money and can compromise test result reliability.
Core Selection Principles
Stick to these six rules to avoid misaligned purchases:
- Matches your actual test requirements
- Meets applicable standards and regulatory requirements
- Supports metrological traceability (you can find a qualified provider to calibrate it)
- Has accessible after-sales support (local service points or reliable remote support)
- Has a stable supply of consumables and spare parts
- Has a controllable total cost of ownership (don’t just look at upfront price)
Configuration Strategies by Lab Size
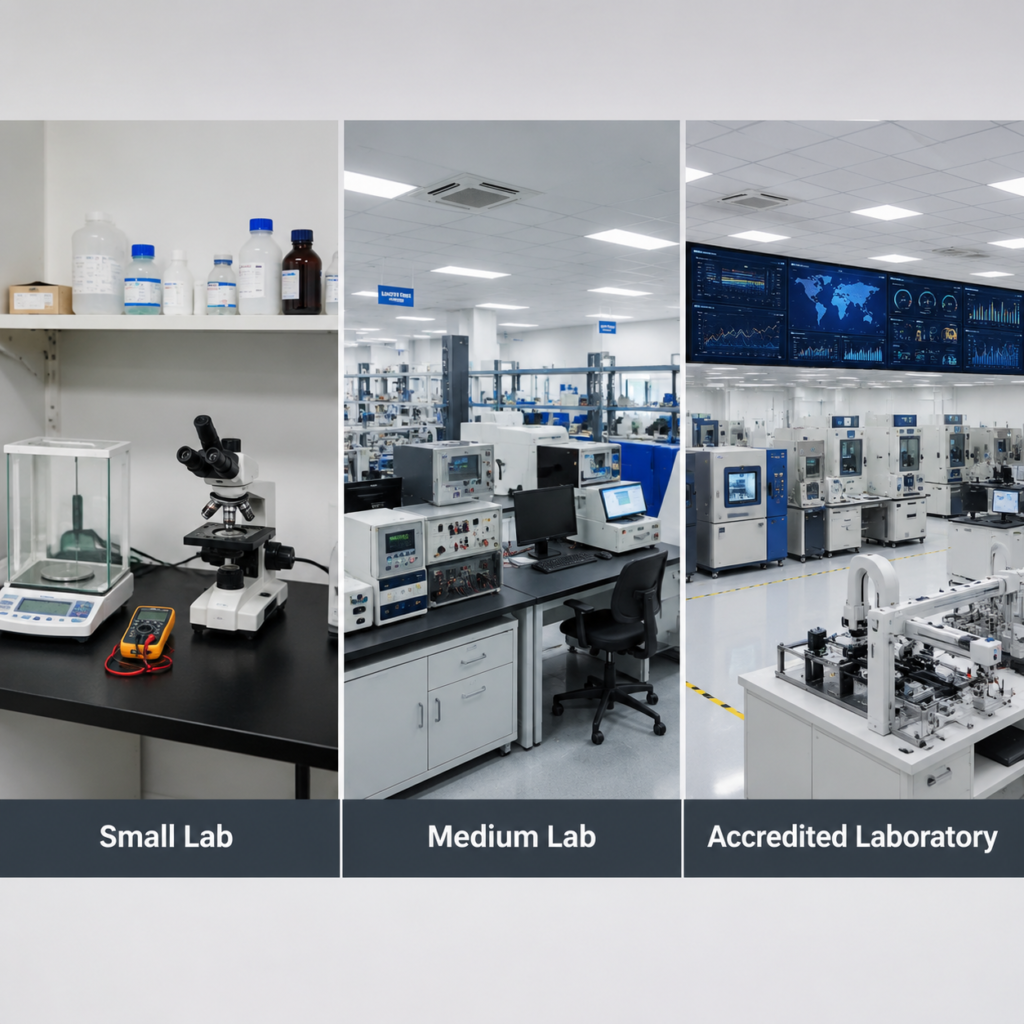
- Small labs: Prioritize general essentials and specialized equipment for your highest-frequency tests. Outsource low-frequency work instead of chasing a “full-service” setup that wastes space and money.
- Mid-sized labs: Build out specialized equipment for your core testing focus. Create backup plans for critical devices – either spare units, or formal outsourcing agreements with nearby labs or third-party providers – to avoid project delays if equipment breaks.
- Large/accredited labs: Deploy LIMS for end-to-end digital equipment management, set up real-time equipment status monitoring, maintain a critical spare parts inventory, and add redundant capacity for core equipment to avoid single-point failures that shut down operations.
Full Procurement and Acceptance Workflow
Buying equipment isn’t just “pay, receive, unbox.” Follow this full process, and keep records for every step:
Requirement confirmation → Supplier evaluation → Technical and commercial comparison → Finalize contract technical clauses (always spell out performance specs, installation & commissioning, training, after-sales support, and warranty terms) → Delivery acceptance (inspect appearance, accessories, and included documentation) → Installation & commissioning → Performance qualification/method validation (prove the equipment actually meets your test requirements) → Document archiving → Operator training and authorization.
Risks With Used and Imported Equipment
- Used equipment: It’s not off-limits, but vet it carefully. Prioritize units in good condition with low usage hours, complete calibration and repair records, valid software licenses, readily available spare parts, and local after-sales support. Avoid discontinued models with no available parts – no matter how low the price, you’ll end up stuck with a paperweight when it breaks.
- Imported equipment: Check these details upfront: voltage compatibility with local power grids, unit conventions (avoid imperial/metric mismatches), available operation languages, compliance with local regulatory requirements, shock protection during shipping, customs duties and clearance costs, and after-sales response time. Don’t wait for a breakdown to find out you’ll be waiting 2+ weeks for a service engineer.
Full Lifecycle Equipment Management
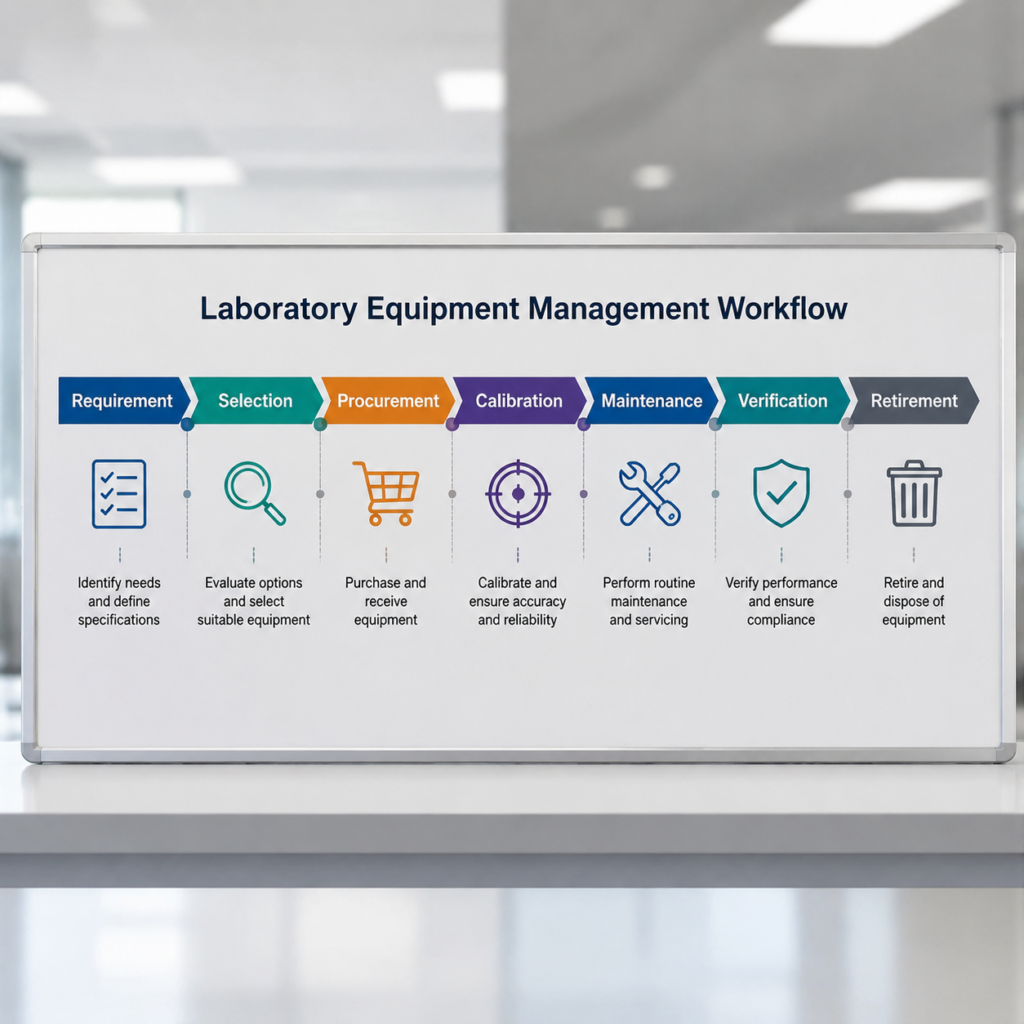
Buying equipment is just the start. A dynamic equipment list must be updated throughout every device’s lifecycle to deliver real value.
Required Asset Register Fields
Your list needs at minimum these fields to qualify as a proper equipment asset register:
Equipment name, unique ID (one per unit, no duplicates), model & specification, manufacturer, serial number, core technical parameters, measurement range, accuracy/uncertainty, software version, location, responsible owner, commissioning date, calibration/verification status, intermediate check requirements, use restrictions (e.g., only for specific tests, or certain ranges are out of service), maintenance records, retirement status.
Status Labeling
Every piece of equipment needs a clear status label. There are three standard categories:
- Passed: Calibrated/validated and approved for normal use
- Restricted use: Partially functional or only certain ranges are valid; only to be used for specified tests
- Out of service: Faulty, past calibration due, or pending repair; use is prohibited
We recommend adding a QR code to each label linked to the device’s manual, calibration certificates, maintenance records, and SOPs. This makes daily use and audits far faster – scan the code to access all records instantly.
Calibration, Legal Metrology Verification, and Performance Validation
Many teams mix up these three activities, but they serve very different purposes:
- Calibration: The process of determining a device’s indication error by a technically competent body, which issues a calibration certificate to support metrological traceability. Calibration is generally not a legal requirement on its own, but may be mandatory under accreditation rules, method standards, client requirements, or your lab’s management system.
- Legal metrology (compulsory) verification: A mandatory regulatory requirement for measuring instruments included in your region’s compulsory verification list, carried out by an authorized legal metrology body to assess compliance with legal requirements.
- Performance validation/verification: The process (completed in-house or by a third party) of confirming that equipment performance meets the requirements of your specific test method and intended use. For example, an HPLC unit may pass calibration, but you still need to validate that it meets the detection limit and precision requirements for your specific analyte – a calibrated device won’t automatically pass every method’s validation criteria.
When choosing a calibration provider, prioritize ones accredited by your national/regional accreditation body, with scope covering the relevant parameters. Certificates from these providers are recognized under the ILAC Mutual Recognition Arrangement globally.
Calibration Intervals and Intermediate Checks
Don’t use a one-size-fits-all 12-month interval for every device – that’s not scientifically sound. Set intervals based on: equipment inherent stability, usage frequency, historical calibration results, risk level of failure, manufacturer recommendations, mandatory regulatory/standard requirements, and the equipment’s intended use (e.g., safety monitoring, compulsory verification). Shorten intervals for high-use, drift-prone devices. For stable, low-use devices not involved in high-risk or compulsory testing, you can extend intervals after a full documented assessment and approval from the responsible manager.
Between calibrations, conduct intermediate checks to catch drift early and protect data integrity. Common check methods include: verification with CRMs, duplicate testing of retained samples, comparison with another qualified device, long-term monitoring with control charts, or verification with a higher-grade reference standard.
If a check finds the device is out of tolerance, follow this process: Immediately take it out of service → Assess all data generated since the last passing calibration to determine impact → Repair or adjust the device → Re-calibrate/validate to confirm it meets specs → Get approval from the responsible person before returning to service. If out-of-tolerance results have already been included in issued reports, notify affected clients promptly and offer retesting if needed.
Maintenance and Record-Keeping
Maintenance falls into two categories:
- Routine maintenance: Pre/post-use cleaning, power-on self-tests, environmental condition logging, anomaly recording.
- Scheduled maintenance: Periodic deep cleaning, performance inspections, consumable part replacement, software data backups.
Keep complete equipment records for every device: procurement and acceptance documents, user manuals, training records, usage logs, maintenance and repair records, calibration certificates, intermediate check records, decommissioning/retirement records.
Record retention periods vary by region, regulation, accreditation body rules, client contracts, and your lab’s own procedures. As a best practice, keep records for at least one full accreditation cycle, plus any additional time required for product lifecycle traceability.
Safety Risk Control
For high-risk equipment (high-pressure, radiation-emitting, biosafety, flammable/explosive, high-temperature), develop dedicated SOPs, restrict use to trained and authorized personnel, create emergency response plans, and conduct regular drills to prevent accidents.
Common Mistakes and Best Practices
We’ve compiled 6 of the most common pitfalls in lab equipment management, plus actionable fixes to keep your operations running smoothly.
| Common Mistake | Best Practice |
|---|---|
| List only includes equipment names and models, with no supporting details | Add technical parameters, calibration status, responsible owner, use restrictions, and document links to turn the list into a central management index |
| Same calibration interval for all devices (one-size-fits-all) | Set customized intervals based on risk level, usage frequency, historical stability, regulatory requirements, and intended use |
| Choose equipment based only on the lowest purchase price | Factor in consumables, calibration, maintenance, downtime costs, and depreciation to calculate total cost of ownership |
| Only perform calibration, and skip intermediate checks | Set up regular intermediate check schedules for critical, high-use, drift-prone equipment to catch drift early |
| Equipment records are scattered across different teams, making them hard to find | Use unique equipment IDs paired with QR codes to link all lifecycle records in one place, accessible anytime |
| Buy all possible equipment upfront, even if it will rarely be used | For low-frequency, high-cost tests, prioritize outsourcing, rental, or shared facilities to avoid idle waste |
Frequently Asked Questions
What’s the minimum set of test equipment for a small lab?
There’s no universal answer – it depends entirely on what tests you run. That said, most small labs need these basics: an analytical balance, micropipettes in commonly used volumes, a thermohygrometer, basic dimensional measuring tools, and appropriate safety PPE. Add specialized gear for your 1–2 core test types: for example, a chemistry lab would start with a pH meter and UV-Vis spectrophotometer, while a materials lab would start with a tensile tester and hardness tester. Outsource low-frequency tests until your volume justifies a purchase.
How do I know if my equipment meets ISO/IEC 17025 requirements?
There are four key criteria: First, its performance meets the requirements of your test methods. Second, it is traceable to international or national metrological standards, with valid calibration/verification records. Third, it has a unique identifier and clear status labeling. Fourth, it has complete usage, maintenance, and calibration records, and only authorized personnel operate it. In short: it works, it’s accurate, there’s a paper trail, and someone is responsible for it.
What’s the difference between calibration, legal metrology verification, and performance validation?
Quick breakdown:
- Calibration: “Check how accurate it is, report the error” – used to support metrological traceability, required when specified by accreditation rules, method standards, client requirements, or your lab’s management system.
- Legal metrology verification: “Mandatory regulatory check to confirm compliance” – applies only to devices on your region’s compulsory verification list, and is legally required.
- Performance validation: “Confirm it works for your specific test” – tailored to your test methods. A calibrated device may still fail validation for certain methods if it can’t meet required detection limits or precision.
How do I set calibration intervals?
There’s no universal timeline. Base it on: equipment inherent stability, usage frequency, historical calibration results, risk level of failure, manufacturer recommendations, mandatory regulatory/standard requirements, and intended use. Start with the manufacturer’s recommended interval, then adjust after 1–2 years of historical data: extend intervals (if allowed by regulations) for consistently stable devices, shorten them for units that drift frequently. Note: For devices on the compulsory verification list or with explicitly required intervals in standards/regulations, you must follow the mandated schedule – you can’t adjust these on your own.
Is it okay to buy used lab equipment?
Yes, but only if you vet it thoroughly. Prioritize units in good condition with low usage hours, complete calibration and repair records, valid software licenses, readily available spare parts, and local after-sales support. Steer clear of discontinued models with no spare parts supply – no matter how low the price, you’ll end up stuck with a paperweight when it breaks.
How can I reduce costs for low-use, high-end equipment?
Four common strategies: First, outsource testing to a qualified third-party lab, paying per test instead of covering purchase and maintenance costs. Second, rent equipment for short-term needs – far cheaper than buying. Third, share equipment with nearby labs or university core facilities, paying per hour of use. Fourth, only purchase the equipment once your usage volume grows enough to justify the cost.
What do I do if calibration fails, and how do I handle historical data?
First, immediately take the equipment out of service. Next, use the out-of-tolerance magnitude to assess all data generated since the last passing calibration, and determine how much of that data is affected. If the impact is minimal, document the risk assessment and keep it on file. If the impact is significant, notify all affected clients promptly and offer retesting if needed. Finally, investigate the root cause of the failure (e.g., poor maintenance, excessive use) and adjust your calibration interval or maintenance plan to prevent recurrence.
How often should I update my test equipment list?
It’s a living document – you don’t update it on a fixed schedule, you update it whenever something changes: add new equipment when it’s commissioned, update status when equipment is retired, update calibration status after each calibration, add maintenance/repair records, and update the responsible owner if roles change. It’s also a good idea to do a full inventory every quarter or 6 months to make sure the list matches what’s actually in the lab, with no gaps or errors.
Appendix: Templates and Reference Standards
Fully Customizable Templates
These core templates can be adapted to fit your lab’s specific needs.
Equipment Asset Register Template
| Field Category | Specific Fields | Filling Instructions |
|---|---|---|
| Basic Information | Equipment name, unique ID, model & spec, manufacturer, serial number, purchase date, commissioning date, location, responsible owner | Unique IDs must be globally unique; we recommend a format of “equipment category code + year + sequential number” |
| Technical Parameters | Measurement range, resolution, accuracy class/maximum permissible error, expanded uncertainty, software version, key accessory specs | Must match parameters in the user manual and calibration certificate |
| Management Status | Calibration/verification status, next calibration/verification date, intermediate check requirements, use restrictions, equipment status (in use/restricted/out of service/retired) | Status must match the physical label on the equipment |
| Document Links | Manual storage location, calibration certificate link, SOP link, maintenance record link, training record link | Can be linked to equipment QR codes for scan-and-view access |
Calibration Schedule Template
| Unique ID | Equipment Name | Calibration/Verification Type | Provider Requirements | Last Calibration Date | Next Calibration Date | Interval | Owner | Status (Pending/Sent/Completed/Overdue) | Notes |
|---|---|---|---|---|---|---|---|---|---|
| Calibration / Compulsory verification / Initial verification | Required qualifications/accreditation scope | Fill per assessment results | Note regulatory basis for compulsory verification devices |
Maintenance Record Template
| Unique ID | Equipment Name | Maintenance Date | Maintenance Type (Routine/Scheduled/Post-repair) | Maintenance Content | Performed By | Equipment Status (Normal/Pending Adjustment/Faulty) | Next Maintenance Date | Notes |
|---|---|---|---|---|---|---|---|---|
| Cleaning / performance check / consumable replacement / software backup / fault repair, etc. | Note part numbers and batches for replaced parts |
Intermediate Check Record Template
| Unique ID | Equipment Name | Check Date | Check Method | Reference Material/Standard Used | Result (Pass/Fail) | Performed By | Follow-up Actions | Notes |
|---|---|---|---|---|---|---|---|---|
| CRM verification / retained sample retest / device comparison / control chart / reference standard check | Pass = normal use; fail = follow out-of-tolerance procedure | Attach raw check data records |
You can also add supplementary templates based on your lab’s needs: equipment selection evaluation form, equipment decommissioning/retirement approval form, supplier evaluation form.
Reference Standards and Documents
- ISO/IEC 17025:2017 General requirements for the competence of testing and calibration laboratories (and regional equivalents, e.g., ANSI/ISO/IEC 17025 in the US, BS EN ISO/IEC 17025 in the UK/EU)
- ILAC (International Laboratory Accreditation Cooperation) guidance documents
- Regional metrology regulations and technical specifications (e.g., NIST handbooks in the US, OIML recommendations, national metrology institute guidelines)
- Regional accreditation body requirements (e.g., A2LA, ANAB in the US; UKAS in the UK; DAkkS in Germany; EA member bodies in the EU)
- ASHRAE 110 Method of Testing Performance of Laboratory Fume Hoods
- ANSI/ISEA Z358.1 American National Standard for Emergency Eyewash and Shower Equipment
- ASTM D1193 Standard Specification for Reagent Water
- ISTA (International Safe Transit Association) packaging test series standards
- Industry-specific regulations (e.g., RoHS, REACH, FDA 21 CFR Part 11) and domain-specific test standards
At the end of the day, a test equipment list isn’t a static, unchanging document – it’s a dynamic management tool that grows with your lab. The goal isn’t to list every piece of equipment imaginable, but to make every entry useful, every update timely, and the whole system work for you: to keep equipment well-managed, data reliable, compliance on track, and unnecessary costs down.
Whether you’re a small startup lab or an established accredited third-party provider, starting with a complete, well-structured equipment list and building out your management process step by step will make your testing, operations, and audits far smoother.