
Introduction
Have you ever run into this situation: two USB-C cables that look exactly the same, yet one delivers full 100W fast charging to your laptop while the other only charges slowly? One connects to a 4K high-refresh-rate monitor seamlessly, while the other outputs no video signal at all? One transfers a 10GB file in seconds, while the other takes more than ten minutes?
The huge gap between these cables lies in a tiny chip built inside the connector: the E-Marker. It acts as the digital ID of a USB-C cable, storing all its performance limits, but it is completely invisible to the naked eye. In this article, we will break down everything you need to know: what an E-Marker is, how to read its data, and how to avoid bad purchases with this knowledge.
1. Basics: What Is E-Marker, and Not All Cables Have It
1.1 What Is an E-Marker Chip?
Short for Electronically Marked Cable, an E-Marker is a tiny memory chip embedded inside the USB-C cable connector. It communicates with chargers and devices via the Configuration Channel (CC) pin of the USB-C interface, actively informing connected devices of its performance capabilities. It is one of the core components for USB Power Delivery (PD) fast charging and high-speed data transmission.
1.2 Which Cables Must Include an E-Marker?
Not every USB-C cable has an E-Marker. Per the official specifications from the USB Implementers Forum (USB-IF), E-Marker chips are mandatory only for cables that meet the following criteria:
- USB PD fast-charging cables with a current rating above 3A (over 60W power), such as common 100W and 240W fast-charging cables
- High-speed data cables supporting USB 3.2 or higher specifications
- Multi-function cables supporting USB4, Thunderbolt 3/4/5 protocols
- Cables supporting USB PD 3.1 Extended Power Range (EPR) up to 240W
Standard 3A USB 2.0 charging cables, which only handle low-power charging and basic data transfer, do not require an E-Marker to comply with specifications. You cannot judge a cable’s quality solely by whether it has an E-Marker chip.
2. What Information Is Stored in an E-Marker Chip?
The amount of detail written into E-Marker chips varies by manufacturer — not every field will be fully populated. However, all chips store data across these four core categories:
2.1 Basic Identity Information
This includes the Vendor ID (VID) and Product ID (PID). Cables certified by USB-IF will also include certification identifiers, acting as the cable’s “factory identification number.”
2.2 Power Delivery Capabilities
This is the most critical set of information. It includes maximum supported current (3A/5A), maximum supported voltage, rated maximum power, and support for PD 3.1 EPR mode — all of which directly define the cable’s charging power limit.
2.3 Data and Video Capabilities
It records the supported USB transfer specification, Thunderbolt protocol compatibility, and support for DisplayPort Alt Mode video output. These determine whether the cable can work with high-speed drives, monitors, and docking stations.
2.4 Cable Attribute Information
It notes whether the cable is passive or active, the cable length, firmware version, and other details that affect long-distance transmission stability and signal quality.
3. 4 Methods to Read E-Marker Data (For All User Levels)
There are multiple ways to access E-Marker information, sorted below by ease of use and accuracy. Most regular users will be well served by the first two methods.
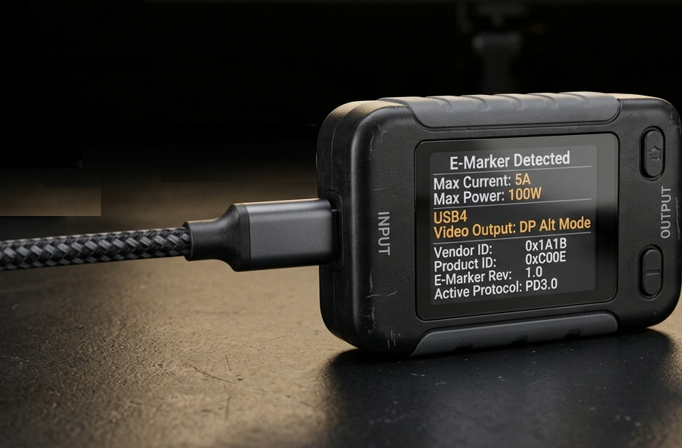
3.1 Method 1: USB-C Tester (Best for Regular Users, Accurate and Intuitive)
This is the most recommended option for casual tech enthusiasts. No teardown or software installation is needed — just plug in and test, with enough detail for everyday use.
- Popular tools: Models like the ChargerLAB POWER-Z series (KM003C, KT001, etc.) are widely used. Most entry-level USB-C testers also support E-Marker reading.
- How to use:
- Connect the tester to a USB-C power source, either a charger or a computer’s USB-C port.
- Select the “E-Marker Info Read” option from the tester’s menu.
- Plug the USB-C cable under test into the corresponding port on the tester, and wait 1–2 seconds for recognition.
- The full E-Marker parameters will appear directly on the screen.
- What you can read: Whether the cable has an E-Marker, maximum current/power, PD protocol version, USB transfer specification, Thunderbolt/video support, and other core data.
3.2 Method 2: Computer Software (Zero Cost, For Users With Access to a Computer)
If you don’t want to buy a tester, you can read partial E-Marker information using your computer with dedicated software. Support varies across operating systems.
- Mac: Free tool WhatCable This is a free, open-source utility that pulls cable parameters from macOS low-level hardware data. It works on Apple Silicon Macs running macOS 14 or later. Operation is simple: download and launch the app, plug one end of the test cable into your Mac’s USB-C port, then click the app icon in the menu bar to see the cable’s power limit, USB specification, Thunderbolt support, and more.
- Windows / Linux On Windows, you can view basic device information in Device Manager under USB controllers, but you cannot read full E-Marker parameters directly. Complete reading requires professional USB protocol analysis tools, which have a high learning curve and are not recommended for casual users. On Linux, you can read low-level chip data via I2C commands, which is only suitable for technical enthusiasts.
3.3 Method 3: Quick Visual Check Without Tools (For Preliminary Screening Only)
If you have no tools on hand, you can make a rough judgment based on markings and real-world functionality. Note that this method only works for quick screening — it cannot confirm the actual E-Marker parameters or protect you from falsely labeled cables.
- Check markings: Look for printed labels on the cable body and connectors. Cables marked with “5A”, “100W”, “240W EPR”, “USB4”, or “Thunderbolt” most likely include an E-Marker. USB-IF certification and CE marks can also serve as references.
- Verify through real use:
- Charging test: Use a high-power charger to see if your device triggers the corresponding fast-charging level.
- Transfer test: Connect a high-speed USB drive or external SSD to measure real file transfer speeds.
- Video test: Connect to a monitor to confirm it outputs the expected resolution and refresh rate.
3.4 Method 4: Professional Testing Equipment (Industrial/Engineering Use)
Professional-grade PD protocol analyzers are used in factory production testing and engineering debugging. They can read full low-level data including Vendor Defined Objects (VDO), SOP’ communication messages, and the complete PD negotiation process. They offer the most complete data but are very expensive and entirely unsuitable for home users.
4. Key Parameters Explained: 5 Metrics Every Regular User Should Know
After reading the E-Marker data, you don’t need to dig into every field. Focus on these five core metrics:
4.1 Maximum Current
Common values: 3A, 5A
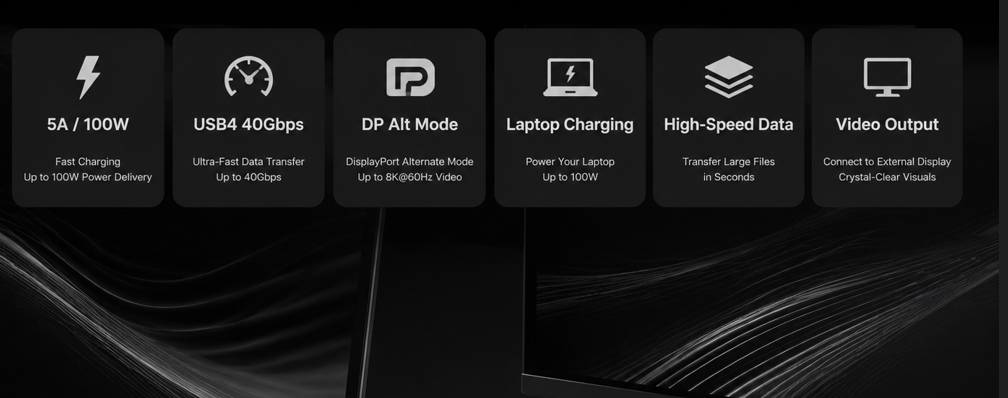
This is the most basic power indicator. 3A corresponds to a 60W power limit (20V 3A), falling into the Standard Power Range (SPR). 5A supports up to 100W (20V 5A), and can reach up to 240W when paired with PD 3.1 EPR mode.
4.2 Rated Maximum Power
Common values: 60W, 100W, 240W
This is the maximum power the cable can carry, not the actual charging power. Real charging power also depends on the charger, the device’s supported protocols, and the current state of the battery.
4.3 USB Transfer Specification
Common tiers: USB 2.0 (480Mbps), USB 3.2 Gen2 (10Gbps), USB4 (20/40/80Gbps)
This directly defines the cable’s transfer speed. USB 2.0 is sufficient for daily charging and connecting keyboards/mice. For external drives and high-speed USB storage, choose 10Gbps or higher. For professional high-speed peripherals, opt for USB4 or Thunderbolt.
4.4 Thunderbolt Support
Common tiers: Thunderbolt 3, Thunderbolt 4, Thunderbolt 5
Cables with Thunderbolt support handle full-speed data, high-resolution video, and laptop charging all in one — ideal for single-cable docking setups. They are commonly used with professional docking stations, external SSDs, and high-end monitors.
4.5 Video Output Capability
Mainly checks for DisplayPort Alt Mode support
Cables with this feature can connect directly to monitors and projectors for video output without extra adapters. Cables without it can only charge and transfer data, and cannot output video.
5. FAQ: Why Can’t I Read E-Marker Data?
Many users run into this issue on their first try. It almost always comes down to one of these four causes:
- The cable has no E-Marker chip: This is the most common reason. Standard 3A charging cables and basic USB 2.0 data cables do not include an E-Marker by design, so no data can be read.
- Your testing device does not support E-Marker reading: Some cheap USB testers only measure voltage and current, with no E-Marker reading functionality.
- Adapters interfere with communication: If you use a dongle, extension cable, or docking station in between, it will block CC pin communication and prevent E-Marker data from being read properly. Always plug the cable directly into the tester.
- Device/software limitations: Some computer and mobile operating systems do not expose full cable information to users. Even if the cable has an E-Marker, you may only see partial parameters — or nothing at all.
6. Pitfalls to Avoid: 3 Common Misconceptions
6.1 Misconception 1: E-Marker = Faster Charging
The E-Marker only records the cable’s maximum capability. Actual charging speed is negotiated between the charger, the device, and the cable. For example, using a 100W cable to charge a phone that only supports 20W will still cap out at 20W, regardless of the cable.
6.2 Misconception 2: Matching E-Marker Parameters = Genuine Cable
Low-quality cables can have their E-Marker chip data rewritten to fake higher specifications — for example, labeling a 3A cable as 5A, or a USB 2.0 cable as USB 3.2. Never rely solely on E-Marker readings; always cross-verify with real transfer and charging tests.
6.3 Misconception 3: E-Marker Can Judge Overall Cable Quality
E-Marker data only reveals performance specifications. It cannot tell you about conductor material, shielding structure, bend durability, build quality, or long-term reliability. A premium cable and a cheap one may show identical E-Marker parameters, but differ drastically in real-world durability.
7. Buying Guide: Pick the Right Cable With E-Marker Knowledge
Here is a simple decision framework to help you buy the right cable without overspending:
- For charging phones, earbuds, and other small devices: A standard 3A cable is sufficient; an E-Marker is not required.
- For laptop fast charging, high-speed external drives, or monitor connections: Always choose cables with an E-Marker, and prioritize products with clearly labeled specifications on the product page.
- For high-priced Thunderbolt or 240W fast-charging cables: Verify the E-Marker data with a tester after delivery, and compare it against the advertised parameters to avoid falsely labeled products.
- Prefer USB-IF certified cables for more reliable compliance with official specifications.
8. Summary
An E-Marker is the digital ID of a USB-C cable, recording core capabilities including power, data transfer, and video support. It is a valuable tool for judging what a cable can do.
For regular users, the most practical way to check E-Marker data is with an affordable USB-C tester — easy to use and informative enough for daily needs. If you don’t want to spend money, you can use computer software for a preliminary check, or do a quick visual screening via cable markings.
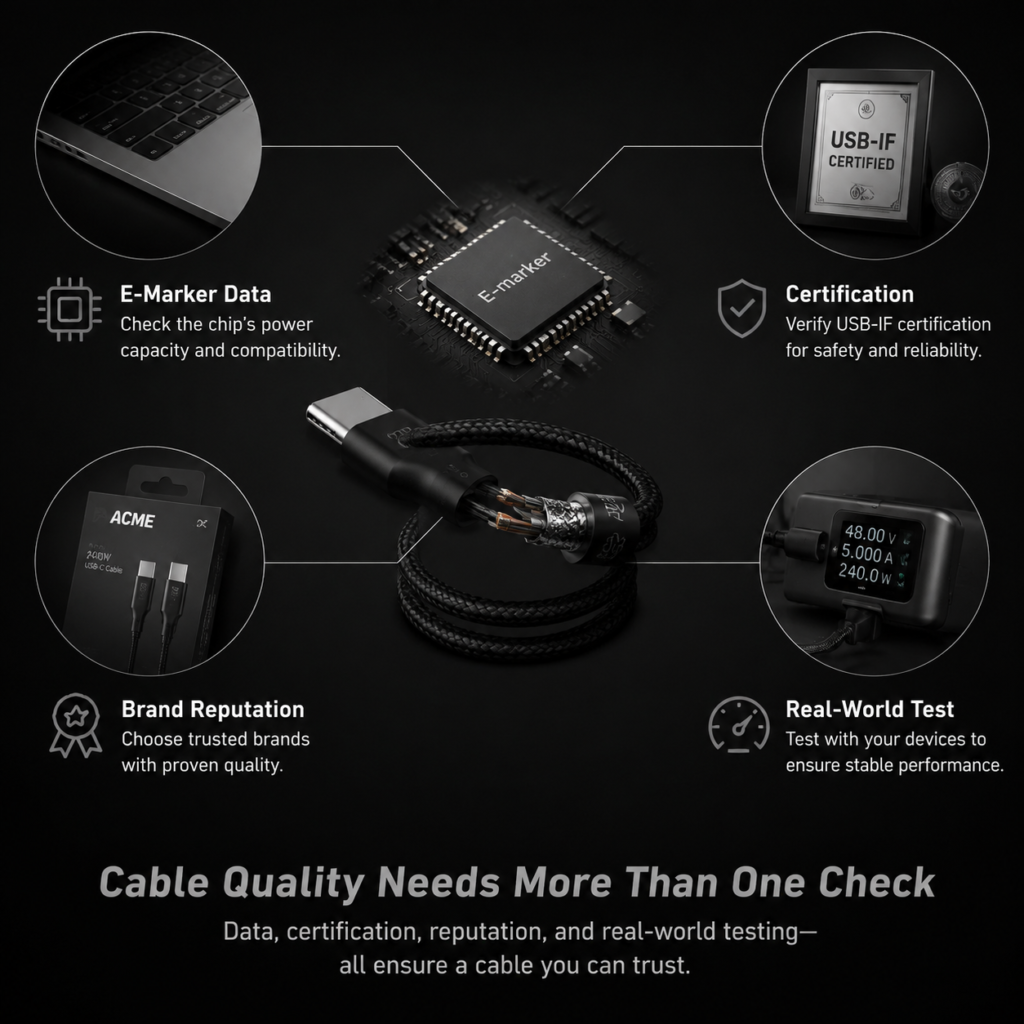
Keep in mind that E-Marker data is a reference, not the full picture. It helps you avoid falsely advertised cables, but it cannot represent the overall quality and durability of a cable. Always make your judgment based on certification, brand reputation, and real-world experience.